A home studio’s setup is like a playground for sound. Just like how children (and adults) need the right environment to play and learn, your music needs the correct space to flourish. Getting your recording environment right involves many steps. Start with the basics: room size, shape, and materials. These will dramatically influence how sound bounces and behaves. Then, move on to aspects such as acoustical treatment. Add some bass traps, diffusers, and absorbers to control echoes and improve sound quality. It’s a bit of a science, but you can turn your room into a suitable recording environment with a little know-how and some patience.
Recording Environment Essential Tools
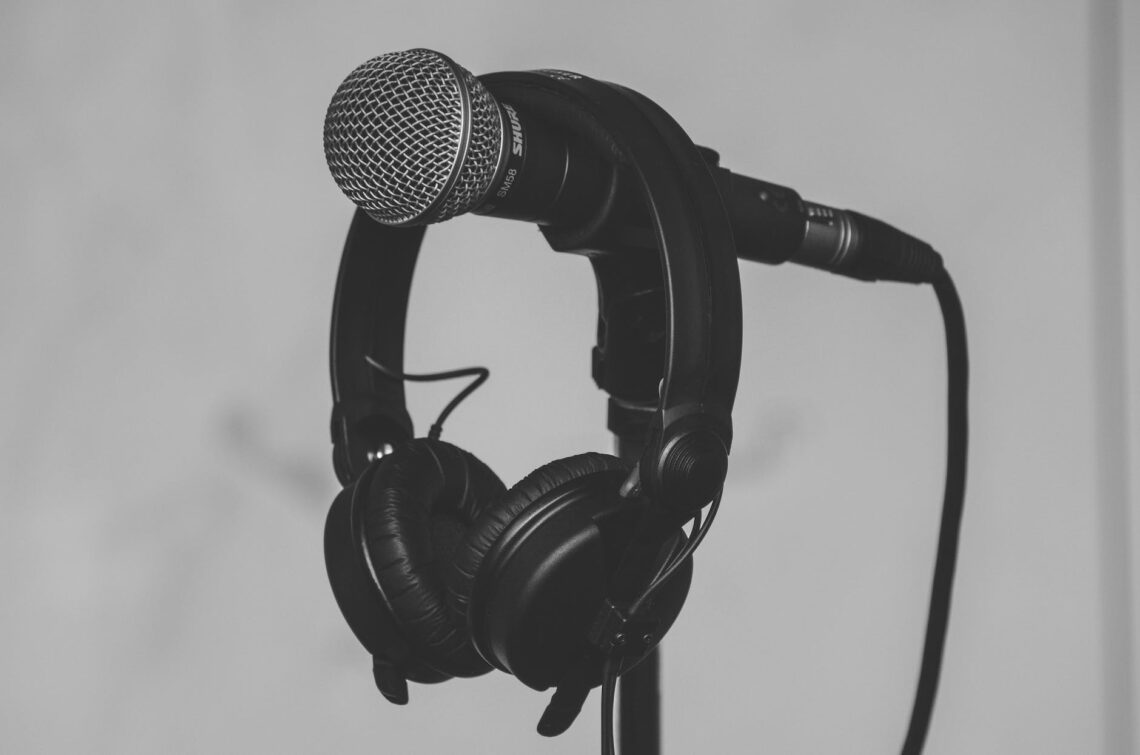
Every artist’s toolkit will vary, but there are some universal essentials. First and foremost, you need a quality microphone. Then comes the audio interface—a device that translates your music from analog to digital. Studio monitors, headphones, and a pop filter for your microphone are other essentials. Do not forget the software, a digital audio workstation (DAW), where you’ll record, edit, and mix your music.
A list of essential tools for a home studio:
- Digital Audio Workstation (DAW): A DAW is software used for recording, editing, and producing audio files. Examples include Pro Tools, Logic Pro, and Ableton Live.
- Audio Interface: This is the hardware that connects your computer with your other gear. It’s responsible for converting analog signals to digital ones that your computer can understand and vice versa.
- Microphones: Depending on your recording needs, you might want several types. A large-diaphragm condenser microphone is great for vocals and acoustic instruments, while a dynamic microphone is great for louder sources, like guitar amplifiers.
- Headphones: A good pair of closed-back headphones for tracking and open-back headphones for mixing are essential for accurate audio evaluation.
- Studio Monitors: Unlike standard home speakers, studio monitors provide a flat frequency response, which leads to a more accurate representation of your recording.
- Microphone Stands: Sturdy microphone stands are necessary to hold your microphone during recording sessions!
- Pop Filter: This is used on vocal mics in recording sessions to eliminate plosives – those harsh “P” and “B” sounds that can cause distortion.
- Acoustic Treatment: This can range from professional foam panels to DIY solutions. The goal is to minimize reflections and manage frequencies in your recording environment.
- MIDI Keyboard: A MIDI keyboard doesn’t produce sound on its own, but it can trigger virtually any sound when connected to a computer. Useful for creating beats, synths, and even complete orchestrations.
- Cables: Don’t forget about the cables needed to connect everything! XLR cables for microphones and audio interfaces, and TRS cables for connecting monitors to the audio interface.
- Music Stand: If you’re recording instruments or vocals, a music stand can be a great way to hold sheet music, lyrics, or notes.
- Software Instruments and Plug-ins: While your DAW will likely come with some, having a variety of software instruments and audio plug-ins allows for more creative flexibility.
Remember, while all these tools are important, starting simple and slowly adding to your studio as you learn more about your recording needs can be very effective.
A Peek into My Studio Setup
In my setup, I use a variety of equipment, as listed below. I’ve spent hundreds of dollars on treating my room to a reasonably flat sound response, but it is not perfect. My room is great for tracking, and I can get away with mixing as well (I use the Sonarworks Reference 4 Studio to correct additional EQ problems with my room). But for mastering, the room acoustics are not good enough. This is why I always outsource mastering to a third party.
My Sound’s Core – The Fender ’65 Twin Reverb
My Fender ’65 Twin Reverb is far more than just an amplifier; it’s the pulsating heart of my sound! Known for its pure, bell-like tones and rich spring reverb, it elevates my guitar’s sound to new heights (I’m starting to sound like an advertisement). I can get some seriously raw, rock energy from this thing (think Kurt Cobain), or dial it back for clean, jazzy tones.
My Artistic Tool – The Fender American Professional II Stratocaster HSS
While I have a few different guitars, my Strat (Fender American Professional II Stratocaster HSS), with its deep roots in rock music, is the expressive tool through which I channel my rock energy. The unique combination of single-coil and humbucker pickups offers me a vast tonal palette, ranging from crisp, clear tones to warm, full-bodied sounds (I really need to stop sounding like an advertisement).
Monitoring with Sharp Precision – My Audio-Technica ATH-M50xMO and ADAM Audio A7X
For monitoring, I rely on my Audio-Technica ATH-M50xMO headphones and ADAM Audio A7X powered studio monitors. These offer me exceptionally clear audio feedback when I’m tracking and mixing. The ATHs provide great clarity and range. They’re awesome for critical listening, especially when trying to find those pops and other unwanted noises. Paired with the A7X monitors, I can switch back and forth and test my music.
The Shure SM7B and Rode NT2-A
I use the Shure SM7B dynamic microphone to capture my vocals, a staple in the broadcast and podcast industry. It captures clear, smooth vocal tracks without the harshness that can sometimes be associated with condenser mics. It’s flat. It has a wide-range frequency response which suits me and my vocal style well. When I need versatility for recording various acoustic sources, I turn to my Rode NT2-A large-diaphragm condenser microphone. It offers a switchable polar pattern, a high-pass filter, and a high-frequency boost. I sometimes use this for vocals, but often it pairs with my acoustic guitar (an Ovation) as needed.
I’ve left some things off the list, but you get the idea. A home studio isn’t cheap but doesn’t have to break the bank either. I chose to buy a better guitar and better amp after years of playing with sub-par equipment. I didn’t start with expensive gear.
Achieving a Professional Sound in a Home Studio
Achieving a professional sound in a home studio is no easy feat, but it’s not impossible. The trick is to put adequate focus on the basics first: room acoustics, good-quality equipment, and knowing how to use that equipment effectively.
Room Acoustics
Before even considering equipment, the first step to setting up a home studio is to evaluate and adjust your room’s acoustics. Your room’s shape, size, and contents can significantly impact the sound of your recordings. There’s no one-size-fits-all solution. Hard surfaces can cause sound reflections, while corners can create bass build-up.
To optimize room acoustics, many home studio owners use acoustic treatments like diffusers, bass traps, and absorbers. These tools can minimize reflections, balance frequencies, and generally create a ‘flatter’ sound profile, giving you a more accurate perception of your recordings. It’s crucial to remember that even the best gear can’t compensate for poor room acoustics.
Good-Quality Equipment
Investing in good-quality equipment is crucial for professional-sounding recordings. As a starting point, this often means purchasing a reliable computer, a versatile microphone, a robust audio interface, and accurate headphones and/or studio monitors. Good quality doesn’t necessarily mean expensive. In fact, there are many cost-effective equipment options on the market that are used by beginners and professionals alike.
However, it’s important not to get too swept up in the world of gear. It’s easy to fall into the trap of believing that more expensive equipment will automatically make your recordings sound better. In reality, understanding your equipment and how to use it effectively often greatly impacts your sound.
Knowing How to Use Equipment Effectively
Having high-quality gear is one thing, but knowing how to use it effectively is where the magic really happens. For instance, understanding how to properly position a microphone can drastically improve the quality of a recording. Knowing how to use your DAW and its built-in features can enhance your editing and mixing capabilities.
Investing time in learning about different recording techniques, audio editing principles, and even basic music theory can greatly enhance the quality of your music. Numerous online resources, tutorials, and community forums exist where you can expand your knowledge and skills.
In conclusion, focusing on these three basics—room acoustics, good-quality equipment, and effectively using that equipment—can lay a solid foundation for your home studio. As you progress, you can start to explore more advanced techniques and equipment, but these basics will always remain central to creating a high-quality sound.
And remember, less can be more in the world of home recording. It’s better to understand your gear thoroughly than to have a lot of equipment you don’t know how to use.
Recording Environment Common Challenges
Setting up a home studio isn’t without its challenges. Space constraints, budget limitations, and poor room acoustics are common issues. Not to mention, learning to use new equipment and software can be a steep learning curve. It takes time, patience, and a lot of trial and error. But don’t be discouraged—every step brings you closer to a space where your creativity can genuinely shine.
…
Crafting the perfect sound space is an art. It requires patience, perseverance, and a dash of technical know-how. But once you get it right, your home studio will not just be a space—it will be your sanctuary, where your musical dreams come true (cheesy, but I wrote it anyway).
Remember to sign up for the newsletter!